So I Moved to Scotland

This may come as a surprise, but back in early August I left my friends, family, cats, and pretty much everything else behind in Huntington Beach, California when I moved to the United Kingdom. Organizing my move was quite a lot of work, but it has honestly been one of the best decisions that I’ve ever made.

Huntington Beach, CA in early August

I keep getting asked by the people in my life why in the world I decided to do this and Iโ€™m sure you may be thinking the same thing as well. Essentially, I was born in England, but I was raised in California. As a dual citizen, it’s pretty easy for me to move between America and the U.K. While living in California, Iโ€™ve always felt a bit distant and far away from all of my family that lives in The U.K., so moving to be closer to them has always been something that Iโ€™ve wanted to do. I have grandparents, aunts & uncles, and a hoard of cousins that I honestly feel like I donโ€™t know that well.

So I did it, I left California.

Since August, Iโ€™ve been staying with loads of family members, visiting different towns in England, and taking small trips up to Scotland to explore the cities and find out where I actually wanted to settle down.

While most of my family lives in England, Iโ€™ve felt drawn to Scotland since I visited a few years back. I always assumed that Iโ€™d end up living in England, but I ended up reevaluating what I really wanted in life. I felt that Scotland just aligned better with what I was looking for in a place to live.

Since I moved, Iโ€™ve taken trips up to Edinburgh, Dundee, and Stirling, but it was Glasgow that wowed me the most. I always kind of figured that it would end up this way, but it was nice to have some sort of confirmation before I actually moved. It was always going to be between Edinburgh and Glasgow, but once I stepped foot in Glasgow a few weeks back, I just knew that I was going to end up living here.

The view of Glasgow University over the River Clyde

Staying in England over the past couple of months has been amazing, but I am honestly just looking forward to settling into a routine. I have a lovely flat with a sweet flatmate and a job that I canโ€™t wait to start in a couple of weeks. In the meantime, Iโ€™ll be spending my days exploring all that Glasgow has to offer, working out the remaining kinks from my international move, and preparing to start my new job.

And don’t worry, I know I can’t get away with writing an entire post without mentioning my embroidery. Iโ€™ve been updating my journal throughout my time in the U.K., itโ€™s been the best feeling to watch my journal flex and adjust to such a lifestyle change. If you look back at early August, you can pick out the day I landed in London and you can also see individual things I did: visiting the tower of London, going to Nando’s, trying new foods, etc. This has carried on throughout the past couple of months since I’ve moved, and hopefully it’ll never end!

A current photo of my embroidery journal

Anyways, If youโ€™re based in Glasgow or in the surrounding areas, please donโ€™t be afraid to reach out. Iโ€™d love to hear any suggestions that you have for things to do and places to eat. Iโ€™m quite impartial to doughnuts, so bonus points if you have any good recommendations!

Glasgow Botanic Gardens

This isnโ€™t the first post that Iโ€™ve written about my move, you can read the first post about my initial move here. You can also follow me on Instagram and TikTok, where Iโ€™ll be sharing more updates about my move, my embroidery journal, and my other projects as well.

Embroidery Journaling: Supplies

In recent years, journaling has become quite the artform – there are endless ways to keep track of your days. But for me, I quickly grew attached to the idea of journaling via embroidery. To be honest, working on an embroidery journal has absolutely helped me throughout these past couple of tough years. My journal has been there for me through the treatment of a bone infection, the pandemic, the planning of an international move, and even a few monumental societal events.

Essentially, it reflects what I’ve experienced and looking at my journal, you can get a sense of what I’ve gone through. I’d like to be able to help you do the same, but first you’ll need supplies. So shall we?

Supplies list:

Looking to get everything you need to start an embroidery journal in one place? I have kits available on Etsy that include everything that you need to get started.


Enjoyed this post? Then check out some of my other blog posts or purchase the in-depth embroidery journal guide. You can also join the free Embroidery Journaling Facebook Group to chat with others working on their own Embroidery Journals. You can also follow me on any of the following social media websites:

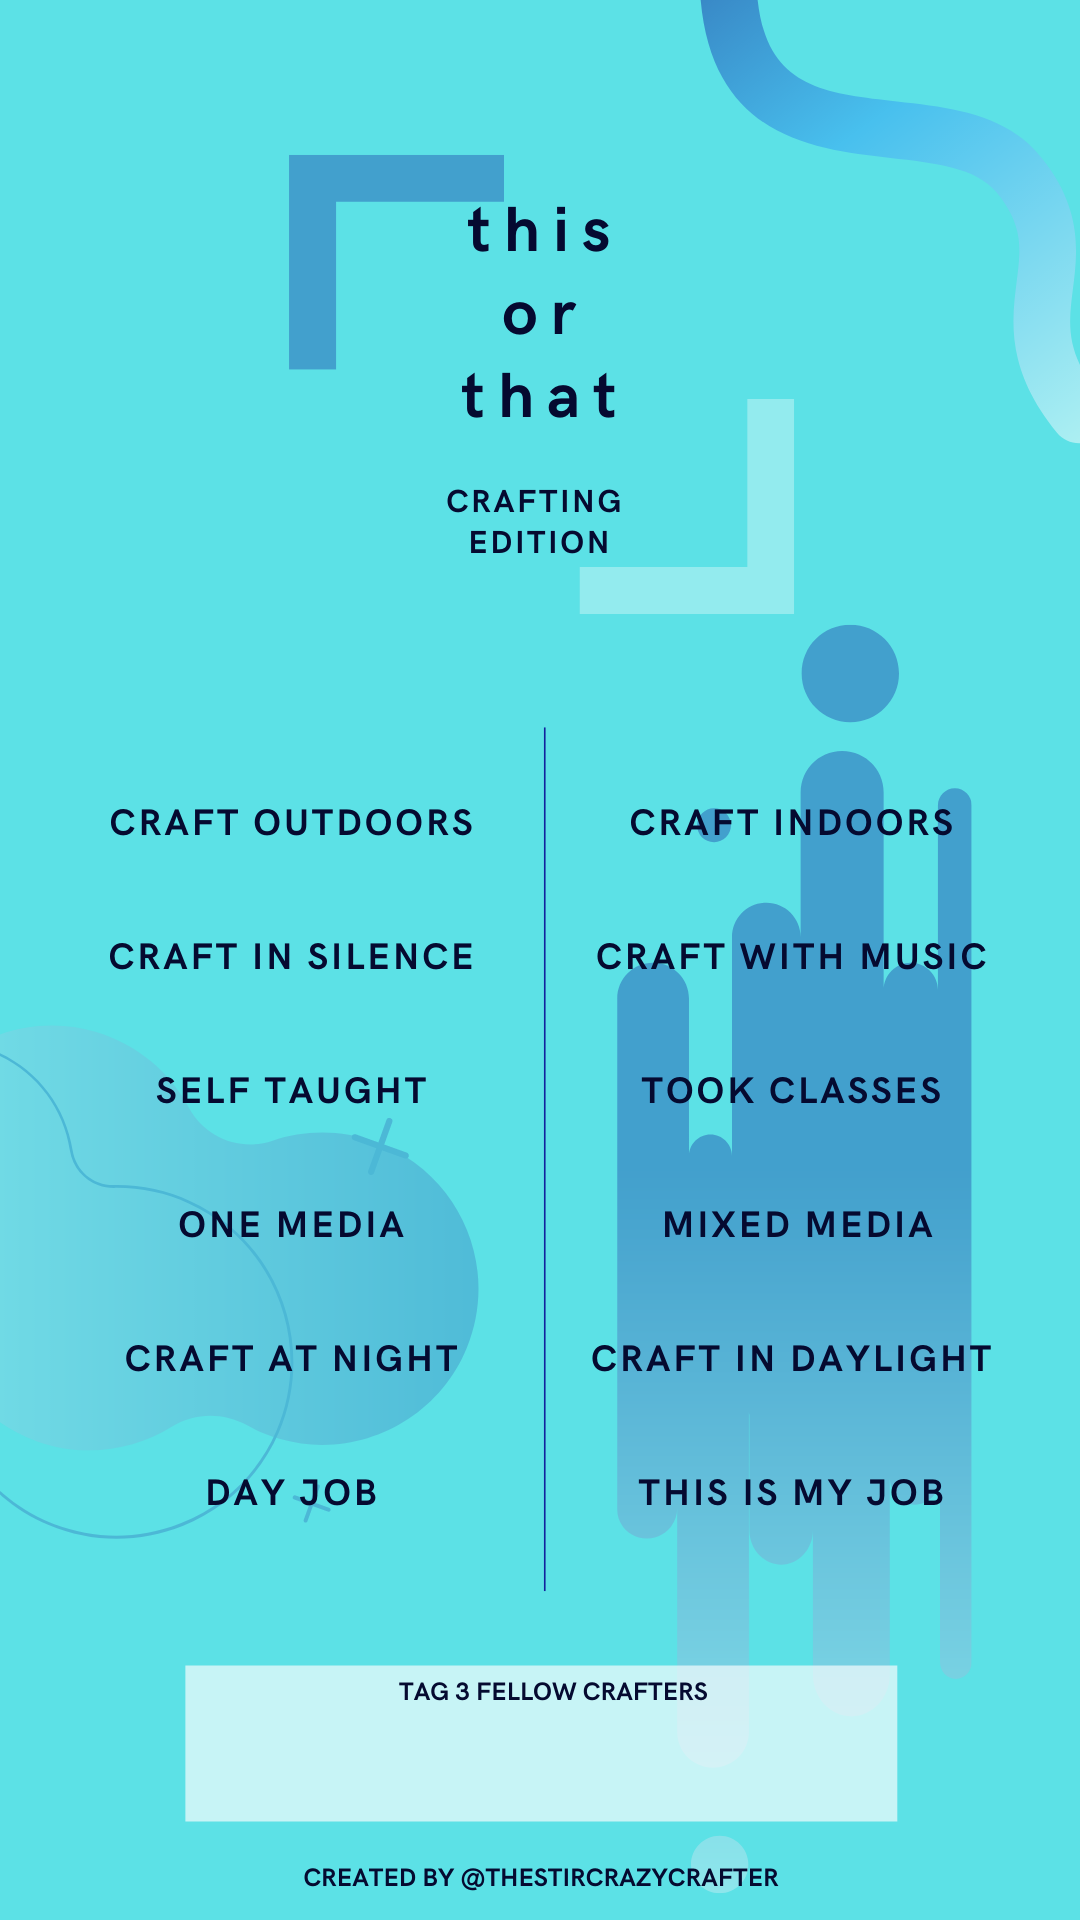
Boost Engagement with Crafting Instagram Games

I’m back at it with even more Instagram Story Games! I loved what I was able to learn from my followers and beyond through these games when I created my Needlework Instagram Story Games post a couple of months ago. So I decided to create some more general crafting games to cover all crafts!

Scroll down to learn more about each of the games and how they are played, scroll down a bit more to download them. These are mostly designed to spark conversations with your followers and for them to learn a bit more about you. They will also boost your engagement a bit, which never hurts.

BINGO is such a classic game! Who hasn’t played it? I can assure you that you haven’t played THIS version of BINGO before! Relating to crafting in the ways of asking about materials you use, when you started crafting, and more, this will surely start conversations with your followers!

Are you old enough to have played Send Me a Number on Tumblr? If so, you’ll surely love this new and improved crafting version. Just paste a question box on top of the appropriate box and wait for the questions to roll in from your followers, wanting to learn more about you.

Gif to Know Me combines a classing Instagram Story Games with those lovely gifs that you can find on the app! Just upload the game into the app and paste your favorite gifs!

Your followers want to know more about you, that’s why they follow you! Go ahead and share a few quick preferences with them about your preferences when it comes to your craft.


Did you enjoy this post? Then don’t forget to check out my Instagram where I share my WIP projects, embroidery journal, and even more tips!

Why I Closed My Etsy Shop

You might have noticed that I shut down my Etsy shop. It was a tough call to make, but it was one that needed to happen. I loved running my Etsy shop, but with what has been going on in the background, it was a necessity. I did however, leave it until the last moment I could.

So what’s been going on? Well….I moved! Living in the U.K has always been something that I’ve dreamed of doing. So I did it! I packed my bags and left my sunny hometown in Orange County, California for the rain of the United Kingdom.

The view of England from my seat.

One of the biggest question that I’ve had about my move is how I am able to do it. Luckily, I don’t need a visa to move to the UK because I’m already a citizen! I was born in England but raised in California. Because of my British background, I’ve always wanted to move to the U.K. so that I can be closer to my family. It’s tough only being able to see grandparents, aunts and uncles, and cousins every couple of years, if that.

Luckily, since I’m fully vaccinated, I will no longer need to quarantine. So for the next few days, I will be recovering from jetlag in a family members home and exploring London. I’ll spend the majority of my time figuring out my plans to get situated and comfortable in the U.K.

What does the future look like?

“But where does all of this leave The Stir-Crazy Crafter?” you may be wondering. Well, I plan to continue posting as normal on all of my social media accounts and on my website. I will just no longer have a shop option. So more or less business as usual. You can follow along on Instagram and TikTok for my most current updates. You can also catch any past and future posts on my blog.

Today, I explored The British Museum and Covent Gardens. I shared some of the photos from today with photos that I’ve taken on previous trips out to England and Scotland. They are from two separate trips, one in 2016 and the other in 2019. You’ll see shots from as far South as the Isle of Wight, England and as North as Inverary, Scotland.


2022 Update: Since writing this blog post, I’ve settle in quite nicely in Glasgow, Scotland and have reopened my Etsy shop. I sell a variety of embroidery patterns, an in-depth embroidery journal guide, and finished embroidery pieces.


Enjoyed this post? Then check out some of my other blog posts or purchase the in-depth embroidery journal guide. You can also join the free Embroidery Journaling Facebook Group to chat with others working on their own Embroidery Journals. You can also follow me on any of the following social media websites:

Let’s Make a Needle Minder

If you’ve followed my work, then you’ll probably no one thing for sure: I love a good needle minder (A.K.A. a needle keeper) – you can spot them on nearly any work in progress photo that I post. They’re the perfect little accessory for your work in progress project. You can share just an extra bit of personality this way. I tend to swap between my beetlejuice, armadillos, and my Scotland needle minders.

I’ve purchased a few needle minders on Etsy, but the majority of the ones that I own have been hand made from existing enamel pins that I loved. It would seem like making a needle minder would be a difficult task, but it’s not too difficult if you have the correct tools. I definitely recommend using safety goggles and gloves throughout the process.

Shall we dig into it then?

You’ll want to gather the following supplies:

  • A dremel with the following attachments: rounded grinding stone tip and wheel tip.
  • Pliers
  • 10mm x 3mm magnets
  • E6000 glue or a similar strong craft glue
  • Safety wear like goggles and gloves
  • Enamel Pin(s) of your choice

Step 1:

Start by using your pliers to snip the prongs off of the enamel pin. Be sure we wear safety goggles during this step. You don’t want anything flying in your eyes!

Step 2:

Shave down the remainder of the prong. This is when you’ll use your dremel with the wheel tip. At an angle, shave off the rest of the backing.

Step 3:

Now you will swap to the rounded grinding stone tip on your dremel and smooth out the rest of the enamel pin. It doesn’t have to be completely flat, just make sure that there’s no pointy areas that your fabric will catch on.

Step 4:

Grab your glue and put a pea sized dot on the back of your enamel pin. Then grab one of your magnets and place it on the glue. This step can be a little bit fiddly while trying not to put your fingers in the glue, but you’ll manage.

Leave your needle minder to cure in a well ventilated area for 24 hours. After this you’re all set to use your needle minder, all you need is a second magnet!

Looking for a video of the process? Then check out my Reel on Instagram where I take you through the process step-by-step. Don’t forget to follow my Instagram while you’re visiting my page. I often post photos and reels of what I’m working on at a given time.


Enjoyed this post? Then check out some of my other blog posts or purchase the in-depth embroidery journal guide. You can also join the free Embroidery Journaling Facebook Group to chat with others working on their own Embroidery Journals. You can also follow me on any of the following social media websites:

How to Back an Embroidery Hoop: A Quick Guide

So you’ve finished an embroidery project, how exciting! One of your last steps is backing your hoop. It can be a bit off putting to do, but let’s make it a bit easier on you. Once you get the process down, it can actually be quick and enjoyable.

floral embroidery framed in a bamboo hoop surrounded by fresh lavender and rosemary.

So what do you need?

  • Iron and ironing board
  • Hot glue gun
  • hot glue sticks
  • scissors

STEP 1 – First is to iron your finished embroidery piece. There’s a chance you won’t have any visible creases in your fabric. If you feel that you can give this step a pass, then go ahead!


STEP 2 – Now onto backing your hoop – first, you’ll want to pull your fabric taut in your hoop until your piece is positioned as you want it. Remember, once you start gluing down your fabric, it will be difficult to adjust the fabric any further. Tighten your hoop as much as you can.


STEP 3 – Then, you’ll want to trim off any excess fabric from your embroidery hoop and leaving about a third of an inch or so around the edges. You’ll want just enough to cover the interior of the wooden hoop when you glue it down.


STEP 4 – Next you’ll take your scissors and cut slits in the fabric every half inch or so. This will make it easier to glue down the fabric without it bunching up. Complete this step in order to eliminate bunched up fabric.


STEP 5 – Then you’ll use your hot glue gun and create a strip of glue on the inside of your hoop, about an inch at a time.


STEP 6 – Once you’ve laid glue on the interior of the hoop, quickly place the strips of fabric on your line of glue. You’ll want to do this step quickly and carefully so you don’t burn your fingers. Then repeat steps 5 and 6 until you have glued down the rest of the strips of fabric.


Now that you’ve finished backing your hoop, be proud! You can now go on to hang and display your amazing art! This is the finished product of my Freezer Bunny cross stitch piece, it now hangs over my desk. (However it is for sale on my Etsy!).


This is a video of the process for those that prefer videos!

Did you enjoy this guide? Then check out the rest of Sophie’s posts! You can also check out Sophie’s Instagram and Pinterest where she shares lots of neat Tips & Tricks about embroidery.

How Embroidery Journaling Helped Me Navigate 2020

In October of 2019, I saw it – a photo of a beautiful piece of art by @threesixfivestitches on Instagram. It was my first time seeing an 365 project and I couldn’t look away. Sam’s embroidery skills were absolutely masterful. At this moment, I knew that I wanted to create my own version of their 365 day journal. Even today, I am still in awe of this piece of art. I invite you to go and peruse Sam’s account.

At this moment in 2019, I had already expected 2020 to be a year to remember as I was going to be a Housekeeping and Front Desk Manager in Training with a start date of January 4th.

Nearly a month into 2020 and things were looking good!

I started out simple with my journal. The photos could have been a bit better at the start, but everything is a work in progress, right? I was documenting things like the finale of The Good Place, booking trips for the Summer, and starting a new job.

The job was going quite well. Occupancy at out hotel was doing well and I was learning a lot as a Housekeeping Manager in Training.

A third of the way into 2020 and I was finally starting to find my groove amongst the start of the pandemic, which surely wouldn’t last long.

Then the pandemic hit and things changed.

My coworkers and I didn’t think the pandemic would last very long, but then we were furloughed. While there aren’t many stitches in my journal obviously relating to the pandemic, there are stitches relating to how I was feeling at the time. Chill vibes was an inside joke between a coworker and I on the day we were found out that we were being furloughed. HAGS represents the phrase “have a great summer!” which was the phrase my coworkers were saying to each other on our last days at work. We figured we would take a month or so of rest, then come back to a busy as ever hotel.

Six months into 2020 and three months into quarantine life.

My family and I stayed indoors often throughout the beginning of the pandemic. There truly wasn’t much happening in April – June. I did a bit of cleaning, my car broke down, my car was fixed, I did some cooking, and I quietly celebrated my 25th birthday with a walk at the park. I truly did nothing throughout this time besides doing a tone of embroidery.

Though, when doing nothing your mind starts to run. I spent a lot of time thinking about a few years ago when we had visited my family in England and I had planned a detour trip up to Scotland. God I loved Scotland. It was the write type of chilly weather and I couldn’t get over the history and the culture. I had always wanted to move to the UK to be near family. But the idea of living in London didn’t sit well with me. Thinking back to Scotland, it seemed perfect. Glasgow was an up and coming tourist destination in the UK pre-COVID which would be perfect for me. So it was decided, I was going to move to Scotland after the pandemic had settled. I haven’t moved quite yet, but the process has begun!

Nine months in and a bone infection down.

So basically,

I had accepted a temporary security job at a resort hotel, two and a half hours away from home, that somehow involved even more walking than when I had been working as a housekeeping manager. A few weeks into this five week job, I noticed that one of my toes was looking a bit off and painful. I found a nearby podiatrist who ended up telling me that somehow, without breaking the skin, I had formed an infection. One thing led to another, and I ended up back home with a PICC line in my arm getting IV antibiotics pumped into my system three times a day, every eight hours. Honestly, a lot of August through September is filled with stitches relating to all of my medical experiences.

Finished at last.

Shortly after my recovery, I was back at work as a Housekeeping and Front Desk Manager in Training. We had slim teams, but we made it work with what we had available. We experienced multiple wildfires in the area, interesting guests, and a lot of learning experiences. Outside of work, I voted Trump out of office, spent time with family, celebrated the holidays, and ate a lot of tasty food.


Personally, 2020 was a tough year for me, but I learned a lot and I grew as a person. And all the while, my embroidery journal reflected what I was experiencing. If you are considering picking one up.

2022 Update: Since writing this post I have created an in-depth embroidery journal guide which is available on Etsy. It touches on how to set up your journal, how to design your own icons, and so much more.


Enjoyed this post? Then check out some of my other blog posts or purchase the in-depth embroidery journal guide. You can also join the free Embroidery Journaling Facebook Group to chat with others working on their own Embroidery Journals. You can also follow me on any of the following social media websites:

The Launch of a Website

Welcome, I finally launched my own website! I’ve been wanting to do this for ages but the time never felt right. I finally realized that there was no better time than the present.

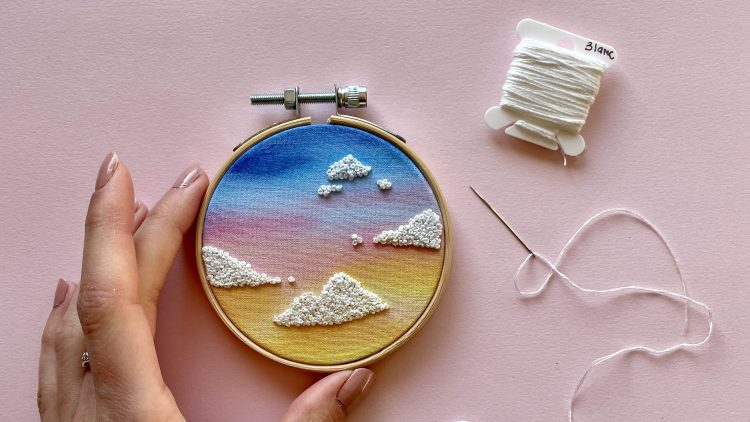
Sunset Watercolor Embroidery

I first started teaching myself to embroider in October of 2019. I picked up one of those kits that you can find on Amazon and got to work. It ended up sucking me in and I finished it quickly. From there, I began to create my own patterns based off of shows that I enjoy. ((if you’re learning to embroidery I definitely don’t recommend the Amazon kits. While they are less expensive than a kit you could find on Etsy, most of the Amazon kits are knock-offs of Etsy kits. Support a small creator by shopping small))

But before there was The Stir-Crazy Crafter, there was The Recipe Pantry – a Tumblr blog that I ran for a couple of years as a teenager. It went moderately well for a Tumblr account. I grew a strong following, some of which followed me to an Instagram account that I created where I shared photos of my own creations. After some time, I started at college and I stopped updating my Instagram account, but when I started to really enjoy embroidery, and it kept me somewhat sane during the pandemic, I decided that it was time for a rebranding.

Raspberry White Chocolate Bundt Cake

I decided on The Stir Crazy Crafter because it would give me the flexibility to share my baking and embroidery and any other crafts that I pick up in the future.

Anyways, I figure that this is just the next step in my journey with The Stir-Crazy Crafter. I can’t wait to find out what’s next. ๐Ÿ™‚


Please feel free to work your way through my website and check out my Instagram and Etsy.

Oh hi there ๐Ÿ‘‹

Sign up to be notified about giveaways, discounts, new releases, & more.

By signing up for this newsletter, you don't need to worry about being spammed with emails.